- Home
- Before and Afters
- DIY Paver Refresh
- Vintage Inspired Ornament
- Basement Bathroom Reno
- DIY Planters
- DIY Dresser
- Basement Wine Cellar
- Frog Tape Challenge
- Entry Closet Makeover
- My Art
- DIY Art
- Upcycled
- Biophilic Design
- Shop My Home
- Shop My Amazon Page
- Savannah & Tybee Island
- Maui, Hawaii
- Press
- Contact Me
- DIY Reworked Pottery
DIY Paver Refresh

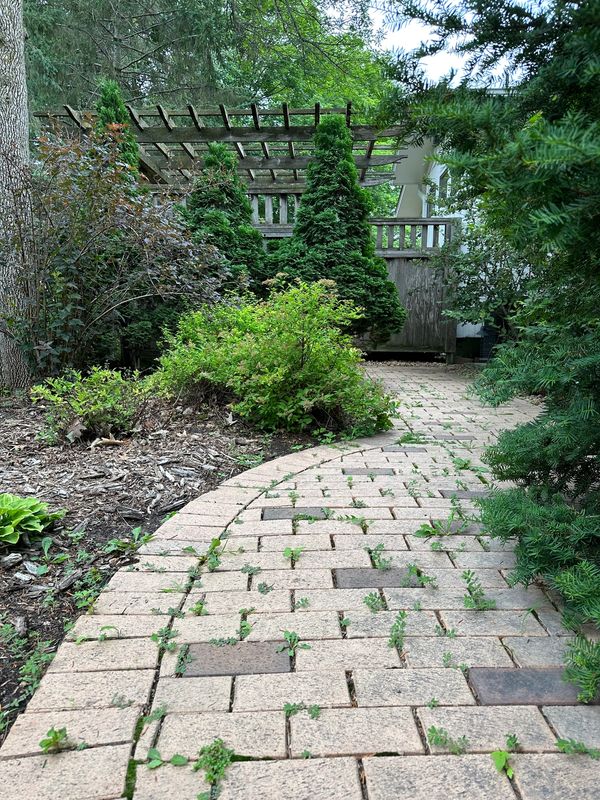
OLD, DATED PAVERS
I wanted to save some pavers I had surrounding my home. They were dated and ugly but I knew I could give them a little TLC and make them feel fresh and new again.

These pavers had weeds growing all throughout. They were dirty, dingy, and dated. They were not doing anything to enhance to landscaping so I needed to make them shine!

POWER WASHING
I started by pulling out the ole power washer and power washed all of the pavers especially focusing on the cracks to make sure all the grime and weeds were out of it.

CONCRETE STAIN
I found this Dutch Boy solid water based stain from Menards. The color is Cauldron in a satin finish.

I painted 2 coats of the stain on with a brush. I tried using a roller but the coverage with a brush was so much better. I decided to work harder with more time spent but in the end it was the right decision. The coverage of this stain is amazing since it is a solid water based stain, allowing me to paint less coats which is key!! Last year I bought a water based stain from Home Depot and had to do about 6 coats for this type of coverage.

SEALER
I found this Dutch Boy water based sealer from Menards. It has a satin finish giving the pavers a little sheen which is pretty.

I painted 2 coats of the sealer on. This step went pretty fast but man was my body sore after all of this work! Be sure to get a water based sealer if you are using a water based stain. If you end up going with an oil based sealer it will just take the stain away.

POLYMERIC SAND
With painting and sealing complete it’s time to finish this project up and put the icing on the cake. I found some polymeric sand that has a gray base and used that to fill all the paver cracks. You pretty much brush all the sand in with a push broom, try to remove the excess as much as possible (a light leaf blow or light sweeping over the top) and then water it all so the sand hardens. I am not going to recommend the sand I used because I don’t like it. I’ve used 2 different types of sand for 2 different projects. One from Home Depot and this one from Lowe’s and don’t like either one. I’ll keep you posted in the future if I find a good one to recommend to you!

PAVERS COMPLETE!
Paver Project is complete! With a lot of hard work and time my paver landscaping is completely transformed. I wanted zero waste for this project. I used what we had and made it so much better with a little extra work.

Here is the After of the side walkway to the backyard. It now looks like a beautiful path to lead you to another beautiful setting.

This is the finished patio landing that leads to the backyard landscaping and lake. These pavers are now enhancing the landscaping versus blending in and looking old and boring.

Head on over to my Instagram page to see some videos of this project and spaces!
This website uses cookies.
We use cookies to analyze website traffic and optimize your website experience. By accepting our use of cookies, your data will be aggregated with all other user data.